Stamped wrapping paper use plain white butcher paper or news print sheets. You can use some sponge stamps and paint or some foam or rubber stamps and stamp pads. The example below use chunky foam stamps I found at A.C. Moore for $1.00,or go after the 26th and get them on discount for a lot less then save for future projects) I also picked up some $1.00 stamp pads.
Sunday, December 16, 2012
ho ho holidays
So the holidays are upon us and the holiday crafting with the kids started in Dec 1st. I will not recap on all that we have done but here are two quickies you can try with your little ones to let them make some things they can give as gifts.
Stamped wrapping paper use plain white butcher paper or news print sheets. You can use some sponge stamps and paint or some foam or rubber stamps and stamp pads. The example below use chunky foam stamps I found at A.C. Moore for $1.00,or go after the 26th and get them on discount for a lot less then save for future projects) I also picked up some $1.00 stamp pads.
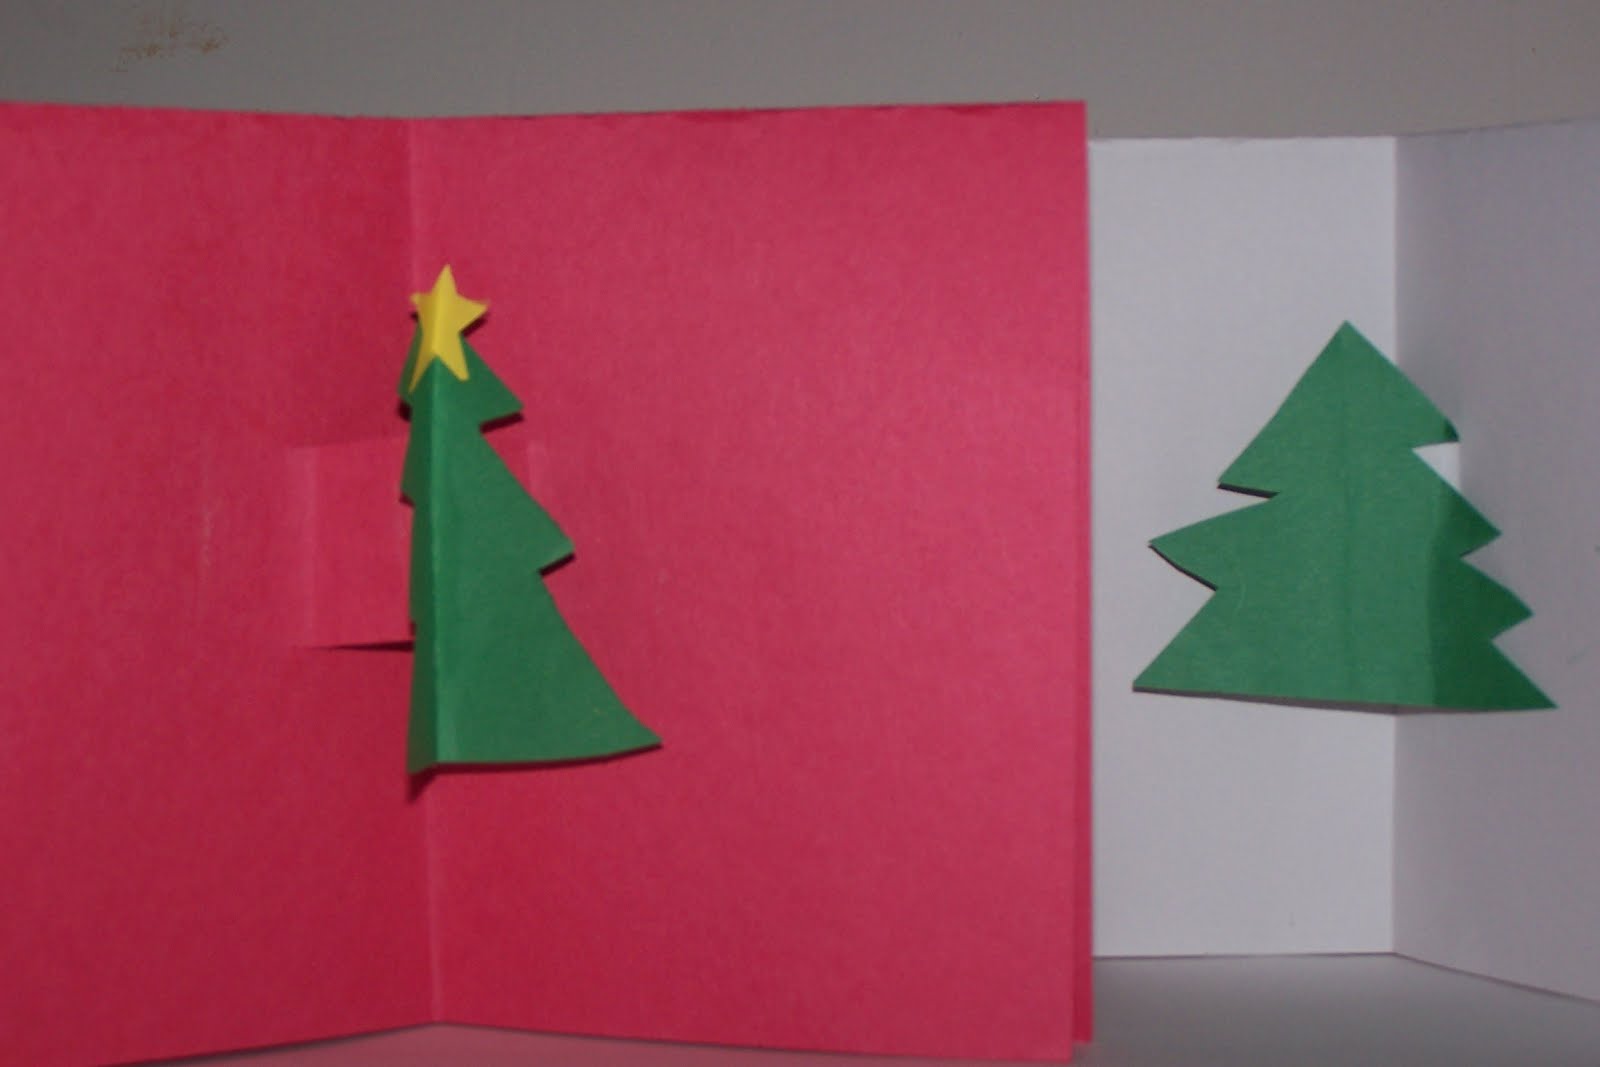
Pop up cards. Use basic construction paper and fold into four equal sections. On the inside fold cut two small slits about one inch apart. Use another color of construction paper and cut out small trees, stars or other shapes then "pop up" or pull the cut section up and away from the top layer and glue the shape onto the fold of that section.
Stamped wrapping paper use plain white butcher paper or news print sheets. You can use some sponge stamps and paint or some foam or rubber stamps and stamp pads. The example below use chunky foam stamps I found at A.C. Moore for $1.00,or go after the 26th and get them on discount for a lot less then save for future projects) I also picked up some $1.00 stamp pads.
Wednesday, December 12, 2012
Paper pots
I was fortunate enough to be a teaching artist for a family day event at the Memorial Art gallery for the Native American family day last weekend. I wanted to share with you the project that we did and a few finished examples of it. I used some construction paper to create a template which I then scanned and was printed onto card stock so that participants could cut the template, decorate the cut out shape then fold on the lines to create their own small paper pots. We had images of Native American south west pottery there to serve as inspiration and some finished examples.
These are the full page templates that you can print out.
Labels:
art gallery,
cardstock,
glue,
markers,
Native American art,
paper,
paper folding,
pots,
pottery
Saturday, November 24, 2012
The Turduckin..
We set out the make a turkey Pinata for Thanksgiving.. He ended up looking kind of duck like... so some of the staff and I were calling him the Turduckin. Anyways, the kids had fun making him and we will break him open after the holiday break.
We used a balloon again like we did for the Halloween Pinatas and we used a cardboard tube to build the neck and paper towels to cover the body and make it brown. Legs, feet and face details were added later with construction paper.
Tuesday, November 20, 2012
Happy Thanksgiving
I played with my Paint software today! Use of oval tool,brush tool, marker tool and the paint bucket....
Have a Happy Thanksgiving everyone.. be thankful and, gobble gobble.
Monday, November 12, 2012
Happy veterans day
This is another paper plate wreath using my bingo markers some construction paper and the Martha Stuart circle punch I let two girls use their imagination and create a poppy wreath for veterans day.
Saturday, November 3, 2012
Haunted House
Twice a year I make these graham cracker houses. I make them at Halloween time with Halloween candy then again at Christmas time with holiday candy.I used chocolate grahams for the Haunted house. The graham crackers are "glued" together into a box shape with frosting.I used full sheets of crackers for this townhouse. I prefer using half sheets for Christmas so it looks more like a cottage house. Then two cracker half's are put at an angle to create the roof. Its kinda like when you build a house of cards.Broken cracker crumbs created the "grave stones" the "sidewalk" and the "dirt". I usually build the house on cardboard sheets with aluminum foil or in this case plastic wrap over them. Best to use something disposable.
Pumpkin collages
This a quick one day project you can finish it in under a half hour.Prep time goes quick with use of a paper cutter.
I cut orange construction paper into strips 1 to 2 inches wide and smaller strips of green paper. Students had a choice of stacking strips horizontally or vertically and rounding off the edges to create the shape of their pumpkin. some choose to let the black background paper show through and others did not. I let the students choose if their pumpkins would have a face or not.
Labels:
collage,
elementary art,
fall,
Halloween,
pumpkins,
subbing calls