Showing posts with label recyling. Show all posts

Sunday, December 16, 2012

Easy, affordable ornaments/ hanging sculptures

 I have been making ornaments with my students in the art gallery program and the after school program. I even used the first one as a station project when substitute teaching for art. These are quick easy and affordable.


primary color scheme ornament

 The first one is a paper ornament. Any paper will do but card stock will work the best .You could also recycle thin card board boxes from tissue or cereal(already patterned on one side, less coloring).  These are two same size circles sliced in half and and the slices slide together. I traced the bottom of a cup for these ones. I use one piece of  scotch tape where the pieces connect then pop it back put 1 hole punch at the top of the bottom circle which has the slit facing upward to hang the ornament. If you are making a couple tracing the circles is easy enough. For use in the classroom I recommend tracing a sheet of circles drawing the slits and using the copier to run sheets of circles and then cut them in groups of twos.

Secondary color scheme ornament


Step 1 Trace circles
Step 2 Cut out circles
Step 3 Color front and back of circles with markers, crayons. pencils etc.
 Step 4 Slide slits together
Step 5 Hole punch the top of the bottom circle( the one with the slits facing up)
Step 6  Tie yarn or ribbon through the hole
Step 7 Secure center circles with small piece of clear scotch tape or white glue where they meet up.


 Card board tube ornaments


Cardboard tube ornament painted with acrylics
 Thinner cut version of ornament
 These project uses card board tubes from paper towel or toilet paper.  You can choose to cut the tube into  thicker pieces 1 inch to 2 or thin1/2 inch pieces.  I have included pictures of a few finished ones to give you some ideas.


Step1   Choose to make an ornament with 3,4,5 or 6 pieces.

Three piece ornament


Five piece ornament


Six piece ornament


Step 2  Press the tube flat to make the cutting easier, cut the piece of the tube so they are all the same size.
Step3   Hole punch the pieces at one end in the middle of the piece.
Step 4  Decorate the cardboard pieces with paint, markers etc.
Step 5   Thread yarn or ribbon through the holes and tie them tight together so they pop out.
Step 6  Choose the top the the ornament and tie a loop of yarn or ribbon through it to hang it from.


The thing I like about these is that they fast, easy and can be personalized any way you want. These do not have to be a "holiday project." They are good for gifts, party favors, or for teaching: color schemes, 3d vs 2d,spatial reasoning, numbers and counting, sculptural elements and positive and negative space.

Thursday, October 28, 2010

Meet selena

 My Halloween theme this year is skeletons. I remember I saw this is in a art project book for kids a few years back.

Selena here is made entirely out of milk jugs. These are strung together with cording to connect her head, torso and pelvic bone.The arms and legs are cut from milk jugs. So altogether you need about five milk jugs. We hole punched the "bones" and then connected them with cable ties. The face and other details are drawn on with Sharpie.

Wednesday, April 21, 2010

Artist trading card collbaration


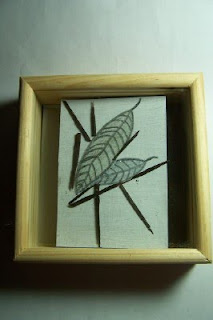
I have been looking at artist trading cards for a number of years. I enjoy making small works of art. I used to work at an art supply store and we were selling these pre cut cards there. I made a few as samples.

I had some left over matte board scraps and some chip board scraps that I cut up to create Artist trading card size pieces from. I will admit they are not all cut perfectly square or to the correct Artist Trading Card size but we are experimenting after all.

I went to my friends house for brunch this last Sunday,we sometimes try to spend our days off together taking photos or doing other creative things.Most of my friends will tell you that if you are inviting me over you should expect bags or bins of art supplies to come with. Rarely do I come over to hang out without bringing a project with me. This is even true when I go out to eat.

So my friend invites me over for brunch and I have all these cards cut.

I started to add something to each card then passed it on to the next person to add one thing to it. Our boyfriends joined us as well.My boyfriend Ed, is meticulous with detail and does not always work well on the spot. My friend Erica's boyfriend work randomly and often works with found objects and photography.He is runs a computer repair shop so he added some drawing and computer parts from a recycled mother board he had.Erica,my friend is a photographer and a trained visual artist. These days she works as a florist so this was a great chance for her to get out some of her old college art supplies.