As the coordinator for the Memorials Art Gallery's Creative Workshop Art Day School pram. I have a unique and long title. This unique job of occasionally teaching classes to 40 something kids all day from 8:30- 5:00. When I am not teaching I am working with fantastic teachers and trained artists, meeting talented and fun kids. I make art with them telling stories to them and hearing stories from them. I also deal with kids when their behavior needs redirecting. I also make parents feel welcome and that their child is cared for and having fun while they are away. Read my Democrat and Chronicle blog post about Art Day School
http://blogs.democratandchronicle.com/rochesterarts/2011/01/26/february-break-art-day-school/

Wednesday, January 26, 2011
Making paper beads a brief tutorial.
These are a great project to do with kids and they can be made smaller and more detailed for adult hands.
You will need: Scissors, glue old magazines ok to cut up, or other colorful paper, straws or toothpicks to wrap paper around, Elmers or other white bottled glue, Modge Podge or gloss medium varnish String to string beads when finished and other beads to combine them with.
Step 1 Cut a paper triangle from a magazine page or fold in half once vertical and cut two at a time. You can get four to six triangles from one page.

Step 2 Hold your straw or toothpick with one hand the paper triangle in the other. Put a small line of glue above the straw and roll the paper around it starting form the wide base end wrapping more narrow end around it.roll until glue is a wrapped up the add more glue.Continue wrapping until all of paper as wrapped. You may need one more small drop of white glue at the tip of the paper to secure the end in place.

Step 3 allow to dry. So that beads are upright so as not to stick to anything. If you are doing this with a group of kids be sure to label the straw or toothpicks with a flag of tape and a sharpie fine point marker.
Step 4 When beads have dried ad glitter or paper confetti if you like and coat with Mod Podge to protect the paper bead and give it some shine.

Tuesday, January 18, 2011
Season Trees
Getting geared for Valentines Day. So back in Fall I put up a Halloween tree. It was literally a branch. Although when I was preschool teacher I made a tree from sheets of cardboard paint and a glue gun for the kids to hang the"Seasons" ornaments on. I also made a tree with balloon weight wires and lights
I never did put up our "Christmas branch" as I call it . In only use mini trees and mini ornaments. Some ornaments for trees I make.Sometimes I use Earrings that have lost their mate. Well at Wegmans in fall I found the battery operated lights and got some.Then I started the wreath trend for winter's holidays and got one more strand for the wreath on our door.
After Christmas the mini trees were sale for only 2.00 so I knew I wanted a black one for my Halloween tree each year and then this red one caught my eye so I created a Valentines tree this year. I used the orange Halloween lights again and then some of my Woodsies with a yarn and a glue gun for ornaments.

Saturday, January 15, 2011

Craft and Zine Fair

Sunday March 20, 2011
11:00am - 5:00pm
The Flying Squirrel Community Space
285 Clarissa Street, Rochester, NY 14608
Local zine writers and crafters vend their wares.
Workshops will be taught.
2$ donation at the door.
I will be teaching an artists trading card workshop at the event.
To be a vender or teach a workshop fill out forms on the pages below.
and email to roczineandcraft@gmail.com
For more info, go to:
https://sites.google.com/site/roczineandcraftfair/Go to the facebook link:
| http://www.facebook.com/?sk=messages&ref=mb#!/event.php?eid=189868944359270 |
Thursday, January 13, 2011
Giveaway I am part of the RNEST network
I am giving away one item thu the RNEST's NING page.
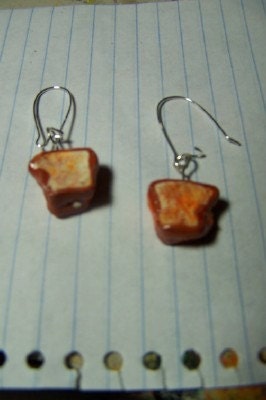
Win these Grill Cheese Earrings!
http://www.etsy.com/listing/61275864/grilled-cheese-sandwhich-earrings
What does RNEST stand for? It's The Rochester NY Etsy Street Team!
I am glad to be a new and recently approved member.
The giveaway will be decided on Feb 15th 2011.
It is part of the Wellspring Wednesday giveaway series.
Go to the RNEST blogger page for more info.
wellspring wednesday
http://rochesternystreetteam.blogspot.com/2011/01/wednesday-wellspring
For more info on RNEST go to these links.
The RNEST NINg page
http://r-nest.ning.com/
Tuesday, January 11, 2011
Craft and Zine Fair March 20th at the Flying Squirrel
Hey all you crafters, craft enthusaists zine makers and collectors...come on down!
Where : The Flying Squirrel Corner of Troupe and Clarisssa Street in the histroric Corn Hill Nieghborhood
When : Sunday March 20th 11-5
Why : It supports local artists. all money for the sale of artist and zine makers wares will go to the artist. All the donations collected help support the Flying Squirrel. suggested 2 dollar donation at the door.
there will be free workshops lots to see and you should really check out the Flying Squirrel.
How : walk, bike or drive (plenty of parking) bus routes stop nearby.
http://flyingsquirrel.rocus.org/
Saturday, January 8, 2011
Back to making dance costumes
I have been interested in Belly dance for a long time now. I have studied with many gifted dance teachers since returning to NY in July 2006. I also really love making my own dance costumes and accessories. I actually am part of a tribal class that is doing a number that needed a tutu for costuming. So I put away the scrap booking stuff and got out the sewing supplies. I looked at several tutorials on how to make your own tutu. I had no idea how many rolls of tulle I would need......... I am also going to make a new belt..... that will need grommets. I am completing these project now and revamping some old pieces that need some repair from dance and travel related wear and tear. some need felt lining,some needs grommets and new way to be adjustable..
So for now here are the old pieces will put up new ones as they are completed.


So for now here are the old pieces will put up new ones as they are completed.


Sunday, January 2, 2011
Unity Dolls for Kwanzaa

For the last few years I am fortunate enough to Work a Kwanzaa event as a teaching artist.I chose an activity and people can drop into a room in the art gallery during the event and spend time making a take home art project.
I choose an activity each year that I feel represents this holiday either in its principles, ideas or in create an image that the holiday.
Part of Kwanzaas principles are unity and cooperative economics. Since paper dolls all "hold hands" and work together I thought this project would be just right.
I usually use construction paper and do a symmetrical folding and cutting activity. I usually have fabric,beads and other mixed media supplies available for embellishment.This year we took the time honored tradition the paper doll chain and gave it a twist.
People really enjoyed the activity over a four hour time span I never had an empty chair for more then a few minutes. It was great because it allowed families to work together and allowed for a lot of variations to the project. They had there choose of paper for the peoples bodies and fabric and vinyl adhesive for clothing.
One little boy wanted a "strong" man. Another boy wanted robots. The young girl often made little girls in long skirts. The clothing that people put on the dolls was impressive. I think there may have been some future fashion designers in that room. Some of these dolls had better wardrobes then me. In fact I decided to go clothing shopping the next day.
There were several young children around age 2 or 3 that really just wanted to cut paper. I had several left over sheets of vinyl adhesive sticker scraps from my friend at Instant Sign Center. I cut these into small pieces and the two and three year old's could just have a blast and cut away. The parents with them would cut out the dolls and then the kids could just peel and stick the stickers they had cut onto the paper dolls they had cut.
If people had any extra dolls they made that they left behind I hung them on the wall with all their hands connected .
Shown here are some examples of what participants made.
