Sunday, February 24, 2013

Feb is Parade month

For the last few years while I have been working as the lead teacher for the after school  program we have been doing "parades" around the hallway of the schools. We do one for  Chinese new year where the kids all put a large piece of paper over there heads to be a parade dragon. Every year I pull the dragon out of storage and well add new decoration to it. I have a large head I made from a brown paper bag and some card stock with a Styrofoam ball for the nose. I made the dragon first in 2007  when I was teaching preschool at a daycare and he is getting a little worn out. I also brought in a gong and some other instruments for the kids to play.
this year was  the year of the snake so we also made red money envelopes with 2013 year of the snake on them. we made the paper dragon parade puppets from a template and we made recycled bottle cap snakes.

We also like to do a Mardi gras parade. for our Mardi Gras parade kids decorate cardboard boxes and make parade floats from them. We put large strings on them so kids can drag them in the ground behind them. Kids bring in stuffed animals from home to put in their boxes so that the animals can ride the floats and be in the parade.


Now that I have an iphone we were able to pull up videos on youtube of real dragon parades and Mardi Gras parades so kids can see where the idea comes from. I always preview the videos at home and save them in a list on my favorites to make sure the content is appropriate.


Tuesday, February 12, 2013

Gustav Klimt inspired "Tree of Life" mixed media

 I just recently finsihed a longterm substitute teaching position at an elementary school.
We looked at the " Tree of  Life" mosaic mural by gustav Klimt. I used a powerpoint and projected it via the computer on to a large flat screen television.
We looked at the orginal Tree of Life Mural.

Then we looked at several forms of reproductions of the image so that student could see how popular the image is.


We first learned about using brushes properly and I showed students how to drag the brush to make thicker lines and how to lift it up toward the tip to make smaller lines.


We then talked about blending and layering colors and using art stix for the background. The last step was adding on some sequins with glue


Thursday, January 31, 2013

Birch Trees in Winter

This idea came from The beginning pages of the book Snowballs by Louis Elhert. This is a simple collage using strips of white paper, black tempera paint and white paper that was hole punched.I did this as a project with the after school program kids.


Monday, January 14, 2013

So many snowman so little time

 So I have not always been the biggest snow man fan. I know some people are all about the little guys but in the past  I was not as affected by the snowman craze. This year I have been bitten by a snowman bug it seems.

 I have been making a lot of snowman projects. I have created snowman earrings with polymer clay and  we be making many different snowman projects with the students in the after school program.
In the classroom while subbing I have also carried over this snowman craze of mine.

In the classroom student have been painting simple white outlines on blue construction paper to make snowman collages with.  They paint the snowman first then later glue on the button and precut construction paper hats and noses and foil paper scarfs.


We  have also been making snowman collages with students and using a template I found on Big Activities.Their is even a great step by step with visuals directions page you can print out.

The results vary and although the worksheets are identical students have unique perspectives on how their finished snow person will look.

So when you are teaching projects on snowmen you have to have some snowman earrings. These are easy to make but if you would like a pair to wear without the time it takes to make them you can order a custom made pair on my sculptresslink etsy shop.

I even made a snowman math activity for the after school program.
this is from an old curriculum guide I had. To do this first make copies of the snowmen,then cut them out color them in and write math problems on their bellies then glue sticks to them and write the answers on the bottom of the sticks. Then decorate a shallow box and put holes in the top to hold the sticks and the box will conceal the answers,


Tuesday, January 8, 2013

Winter scenes at night


This is a drawing project I did with my after school program students.  I gave them black construction paper and white colored pencils. I showed them how to draw the snow hill,a pine tree and a snowman what they did with that was up to them.  We added some color with crayons for snowman details and color and the trees.

Sunday, December 16, 2012

Easy, affordable ornaments/ hanging sculptures

 I have been making ornaments with my students in the art gallery program and the after school program. I even used the first one as a station project when substitute teaching for art. These are quick easy and affordable.


primary color scheme ornament

 The first one is a paper ornament. Any paper will do but card stock will work the best .You could also recycle thin card board boxes from tissue or cereal(already patterned on one side, less coloring).  These are two same size circles sliced in half and and the slices slide together. I traced the bottom of a cup for these ones. I use one piece of  scotch tape where the pieces connect then pop it back put 1 hole punch at the top of the bottom circle which has the slit facing upward to hang the ornament. If you are making a couple tracing the circles is easy enough. For use in the classroom I recommend tracing a sheet of circles drawing the slits and using the copier to run sheets of circles and then cut them in groups of twos.

Secondary color scheme ornament


Step 1 Trace circles
Step 2 Cut out circles
Step 3 Color front and back of circles with markers, crayons. pencils etc.
 Step 4 Slide slits together
Step 5 Hole punch the top of the bottom circle( the one with the slits facing up)
Step 6  Tie yarn or ribbon through the hole
Step 7 Secure center circles with small piece of clear scotch tape or white glue where they meet up.


 Card board tube ornaments


Cardboard tube ornament painted with acrylics
 Thinner cut version of ornament
 These project uses card board tubes from paper towel or toilet paper.  You can choose to cut the tube into  thicker pieces 1 inch to 2 or thin1/2 inch pieces.  I have included pictures of a few finished ones to give you some ideas.


Step1   Choose to make an ornament with 3,4,5 or 6 pieces.

Three piece ornament


Five piece ornament


Six piece ornament


Step 2  Press the tube flat to make the cutting easier, cut the piece of the tube so they are all the same size.
Step3   Hole punch the pieces at one end in the middle of the piece.
Step 4  Decorate the cardboard pieces with paint, markers etc.
Step 5   Thread yarn or ribbon through the holes and tie them tight together so they pop out.
Step 6  Choose the top the the ornament and tie a loop of yarn or ribbon through it to hang it from.


The thing I like about these is that they fast, easy and can be personalized any way you want. These do not have to be a "holiday project." They are good for gifts, party favors, or for teaching: color schemes, 3d vs 2d,spatial reasoning, numbers and counting, sculptural elements and positive and negative space.

ho ho holidays

So the holidays are upon us and the holiday crafting with the kids started in Dec 1st. I will not recap on all that we have done but here are two quickies you can try with your little ones to let them make some things they can give as gifts.

Stamped wrapping paper use plain white butcher paper or news print sheets. You can use some sponge stamps and paint or some foam or rubber stamps and stamp pads. The example below use chunky foam stamps I found at A.C. Moore for $1.00,or go after the 26th and get them on discount for a lot less then save for future projects) I also picked up some $1.00 stamp pads.


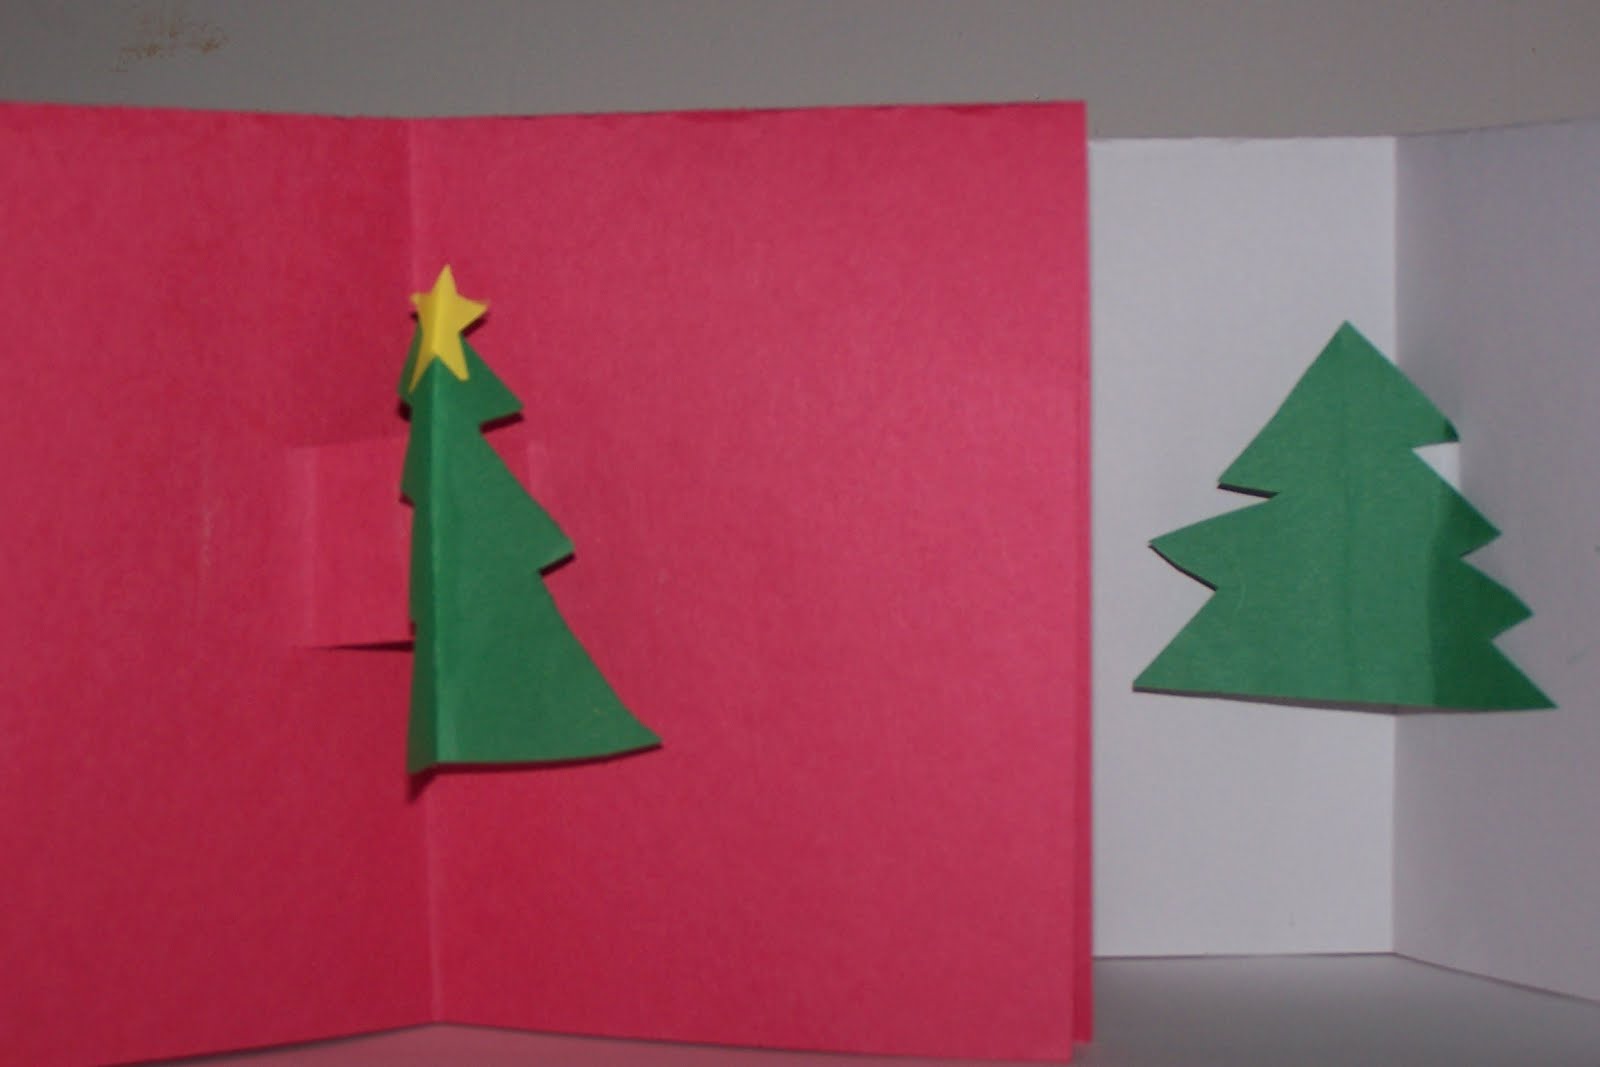
Pop up cards. Use basic construction paper and fold into four equal sections. On the inside fold cut two small slits about one inch apart. Use another color of construction paper and cut out small trees, stars or other shapes then "pop up" or pull the cut section up and away from the top layer and glue the shape onto the fold of that section.